
There are three security groups which are available with a default system. These are Administrator, Librarian and Guest.
The Administrator and Librarian groups have full permissions, whereas Guest only has limited permissions. These have nothing to do with Restrictions.
Where systems have been converted from an earlier system such as Eclipse2, all borrowers will belong to the Guest security group. The Librarian may want to create a new group, perhaps for the staff borrowers, and give them greater permissions.
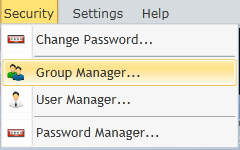
From the menu bar at the top of the screen, click Security / Group Manager.
Click New.
.png)
In the Description box, type a description for the new group, e.g. "Staff".
The user will see there are three root nodes on the Options list: Menus, Toolbars and Commands.
The Menus node allow the user set access permissions for each table in the Management section. For each table listed on the left, select the desired permission:
Modify allows the user of this group to edit a record.
Read Only allows the user to have access to the Edit ![]() button on the right side of many tables. Once viewing a record card, the user may not save any changes.
button on the right side of many tables. Once viewing a record card, the user may not save any changes.
No Access means the button is removed from the screen completely, so any user belonging to this security group will not have access to it.
For example, if the Librarian does not want this security group to have access to Current Loans, highlight Current Loans from the list and then select No Access. If the Librarian would like the user to be able to see Current Loans but not be able to make any changes, select Read Only.
.png)
Once happy with the permission configuration for the Management features, click on the Toolbars node. This enables the user to set which areas are visible to this security group.
Visible allows users in the group to see the immediate area.
Hidden means the button or menu option for this area or function will not be shown.
.png)
In the above example, the affected users of this group will be unable to use Circulate.
The Commands node is where functions may be set which the user in this security group may perform.
Yes allows the user to perform the function.
No means the user cannot perform the function.
.png)
In the above example, the affected users of this group will be unable to view borrower personal details whilst using Circulate.
Once the Librarian has completed choosing the desired group permissions from the root Database, Toolbars and Commands nodes, click OK to save the configuration.
Copyright © 2013 MLS