It is possible to create a New Data Source and get data columns using a wizard or without using it. When creating a data source without using the wizard, you should create a query and, using the Retrieve Columns button, get data columns from the database. When creating a new data source using the wizard, the wizard itself gets data columns from the database. Consider these two modes of creating a data source in more detail.
Creating a data source without using the wizard
Consider creating a new data source via the OleDB connection. To create a new data source, you must create a New Connection. For creating a new database connection, call the New Connection command. This command can be selected in the New Item menu item or the context menu on the Dictionary panel. After selecting this command the Select Type of Connection dialog will be invoked, in which you should define the type of the connection. The picture below shows the Select Type of Connection dialog:
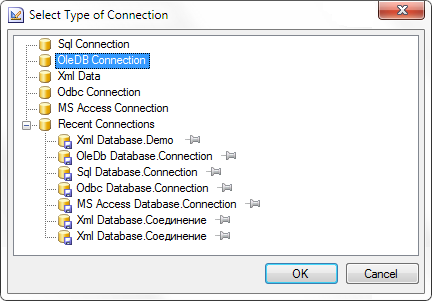
In this case, the Connection object describes the settings to access databases via the OleDB driver. After you click OK, a New OleDB Connection is open, in which it is necessary to fill three fields. In the Name field specify the connection name, which appears in the report generator. In the Alias field specify the name of the new connection, which is visible to the user. In the Connection String define the connection string to connect to the database. The picture below shows a window to create a new OleDB connection:
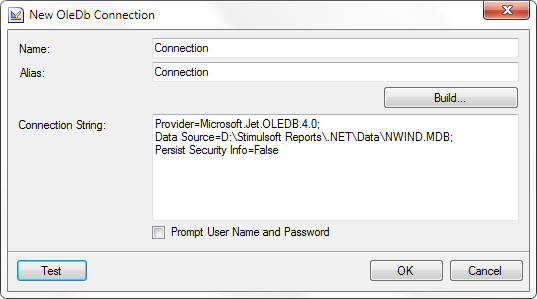
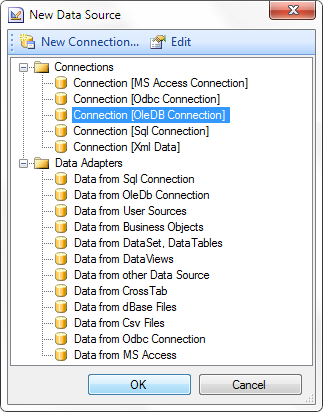
In order to check the connection string, press the Test button. In this case, if the connection string is correct, then the user will be shown a Connection was successful window. If the connection string contain errors, then the user will be shown a window containing the error text that the database server returns in response to an attempt to create the connection. You can also use the create connections wizard clicking the Build... button, which provides the ability to define the connection settings be means of the dialogue. Not all types of connections are supported by the wizard. After clicking Ok, a new connection is created. The next step is to create a new data source. To do this, you should select the New Data Source command from the New Item menu or the context menu on the Dictionary panel. Then, in the first dialog form of New Data Source select the type of connection and press the Ok button. The picture below shows the first dialog form of New Data Source:

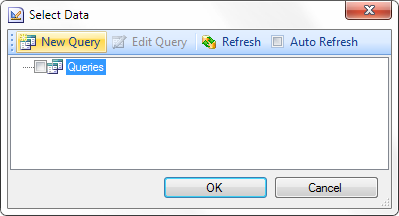
It should be noted that it is possible to call a new connection dialog from the New Data Source. Just click the New Connection... button. After selecting the connection type in the Select Data dialog, click the New Query. The picture below shows the Select Data dialog:
Then in the second dialog form of the New Data Source define parameters such as the Name in Source, Name, Alias. Also in the Query Text it is necessary to generate a database query and execute it. If the request is successful, using the Retrieve Columns button it is possible to get a data column from the database. The resulting columns will be displayed in the Columns field. The following settings such as the Name in Source, Name, Alias and Type can be set for any selected column. You can also add or remove a data column. To add a column, you must click New Column or New Calculated Column. To delete a column, click Delete. The picture below shows the New Data Source dialog:
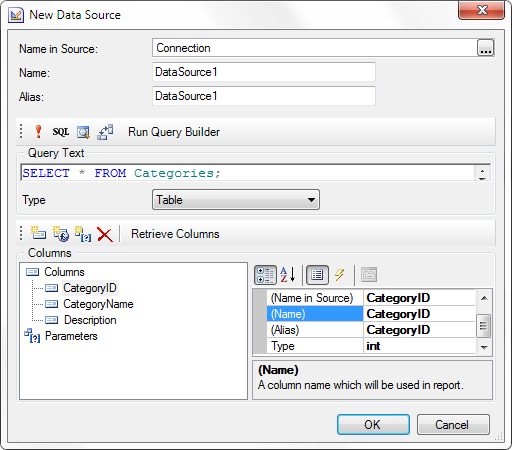
After clicking Ok, the new data source DataSource1 will be created. This data source will contain the following columns: CategoryID, CategoryName, Description.
Creating a data source using the wizard
Consider how to create a new data source using the wizard, i.e. automatically. In this mode, it is possible to create more than one data source at one time. The Connection object to the database via the OleDB driver has already been created. The next step is to create a data source. To do this, select the connection type in the New Data Source dialog. The picture below shows the New Data Source dialog:
Press the Ok button in the New Data Source dialog to invoke the Select Data dialog. To get a list of tables from the database, it is necessary to click the Refresh button in this dialog. You can also enable/disable Auto Refresh by checking/unchecking the flag. If the flag is checked, the wizard will automatically update the list of data tables. The picture below shows the Select Data dialog:
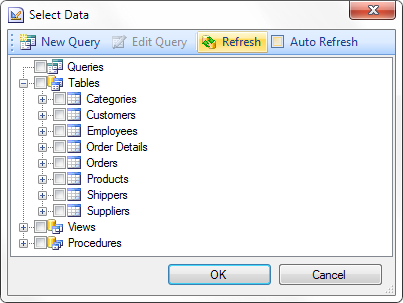
The list in this dialog is represented as the tabs that are positioned hierarchically. The main tab is a category (in this example: Queries, Tables, Views, Procedures). Select the data table to create a new data source. It is also possible to exclude columns of data tables from the prospective data source. To do this, you must open the selected table and remove the check mark beside the column name to be deleted. By default, if you select a data table, all the columns in this table are marked with flags, ie will be added to a new data source. Each selected data table will represent a different data source, ie, one table - one source. The figure below presents the Select Data (Select Data) with the selected data tables and columns marked by the data:
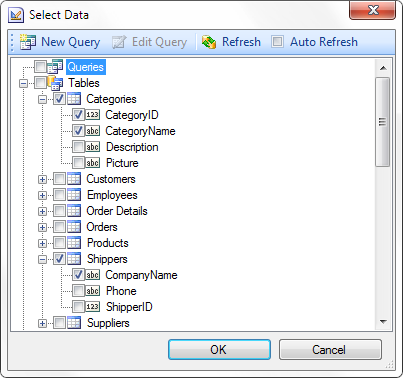
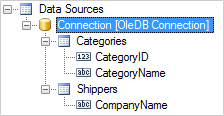
After clicking Ok, a data source Categories with data columns CategoryID, CategoryName will be created and the data source Shippers with the data column CompanyName. The picture below shows created data sources in the Dictionary:
Editing Data Source
Any created data source can be edited. To do this, select the data source, click the Edit button on the toolbar in the Dictionary, or select Edit in the context menu of the data source. After clicking the button or selecting Edit from the context menu, the user will be shown the Edit Data Source dialog. In this dialog the same tools and fields, as well as in the second dialog form of the New Data Source dialog are placed.
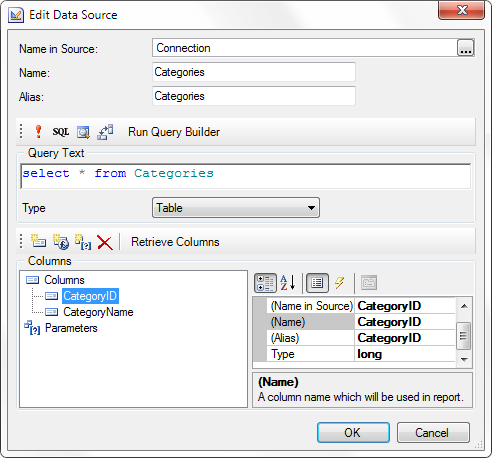
Depending on the type of the data source, the Query Text field may absent in this dialog, because not all connections support SQL queries. All changes will be applied after clicking Ok.